Blog
The Art of Knitting and Crochet Photography: Capturing Stunning Projects
In the world of knitting and crochet, the ability to capture the beauty and intricacy of your creations through photography is a skill that can truly make your work shine. It’s a skill that I, Kristin Omdahl, have honed over my extensive career both in front of and behind the camera. With decades of experience as a professional model, tv personalityl and photographer, I’ve had the privilege of working with countless knitting and crochet designers, publishers, and enthusiasts, capturing the essence of their craft through the lens.
Photos of my first career as a professional model:
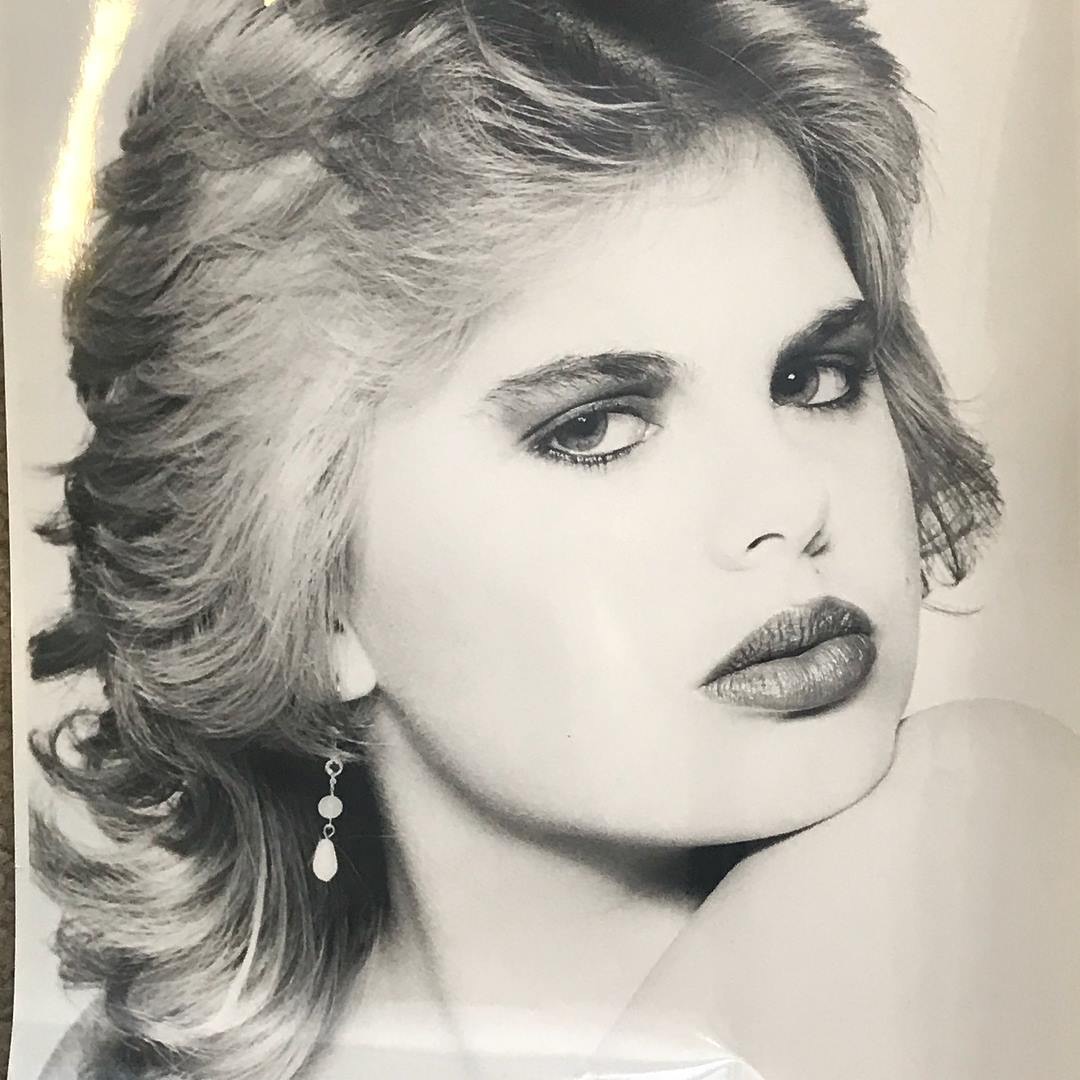
My first photo shoot at age 11 in the John Casablancas Modeling School, Detroit, Michigan.
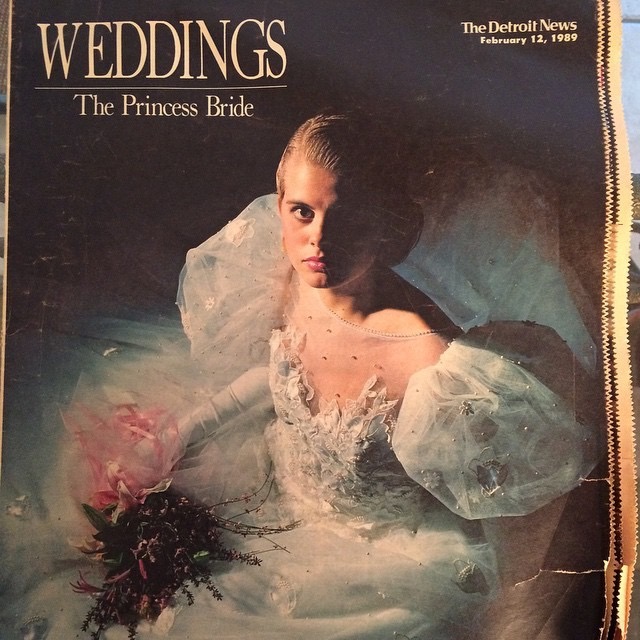
My first cover at the age of 15 in Detroit, Michigan!
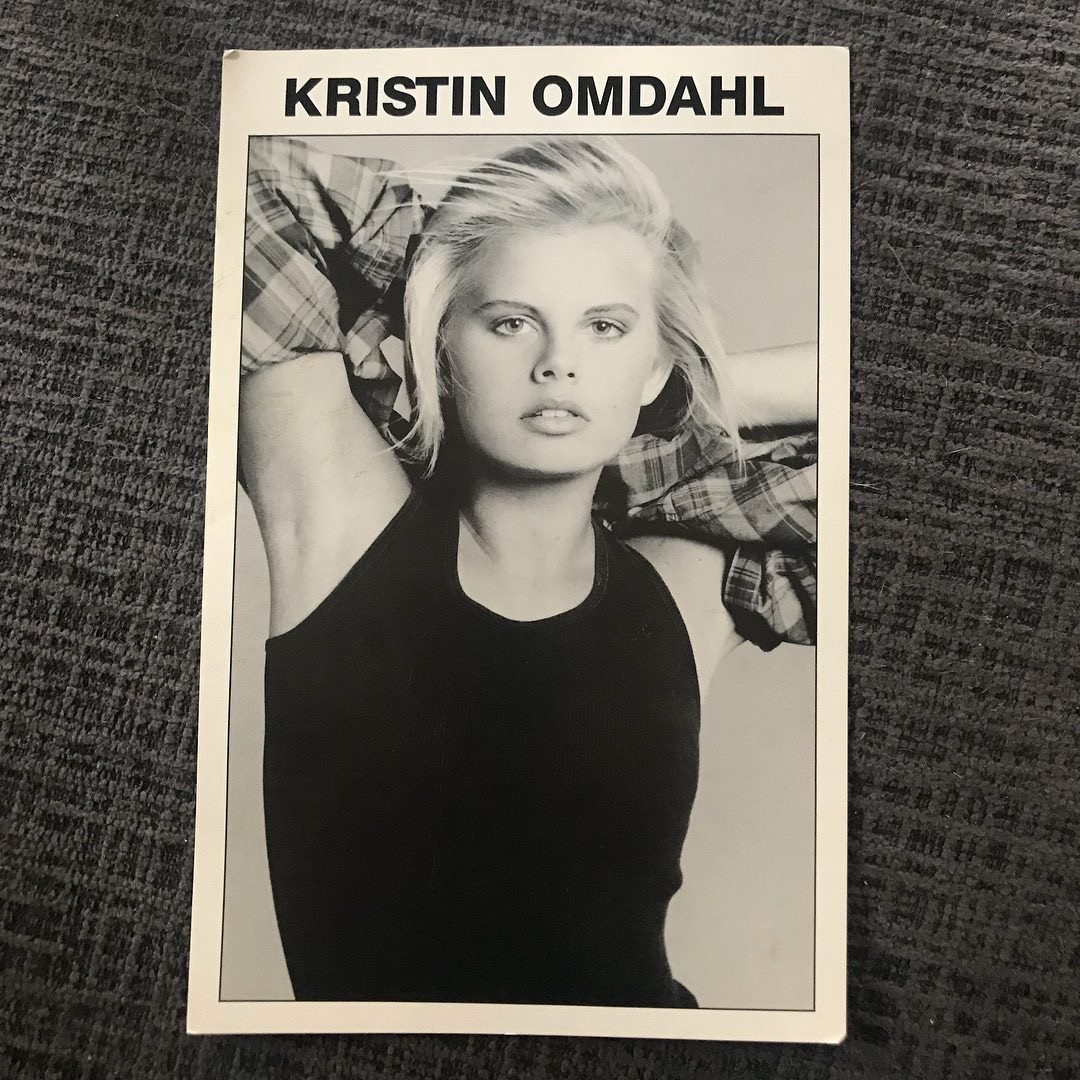
The front of my first composite card with Elite Model Management in Chicago, IL at age 13.
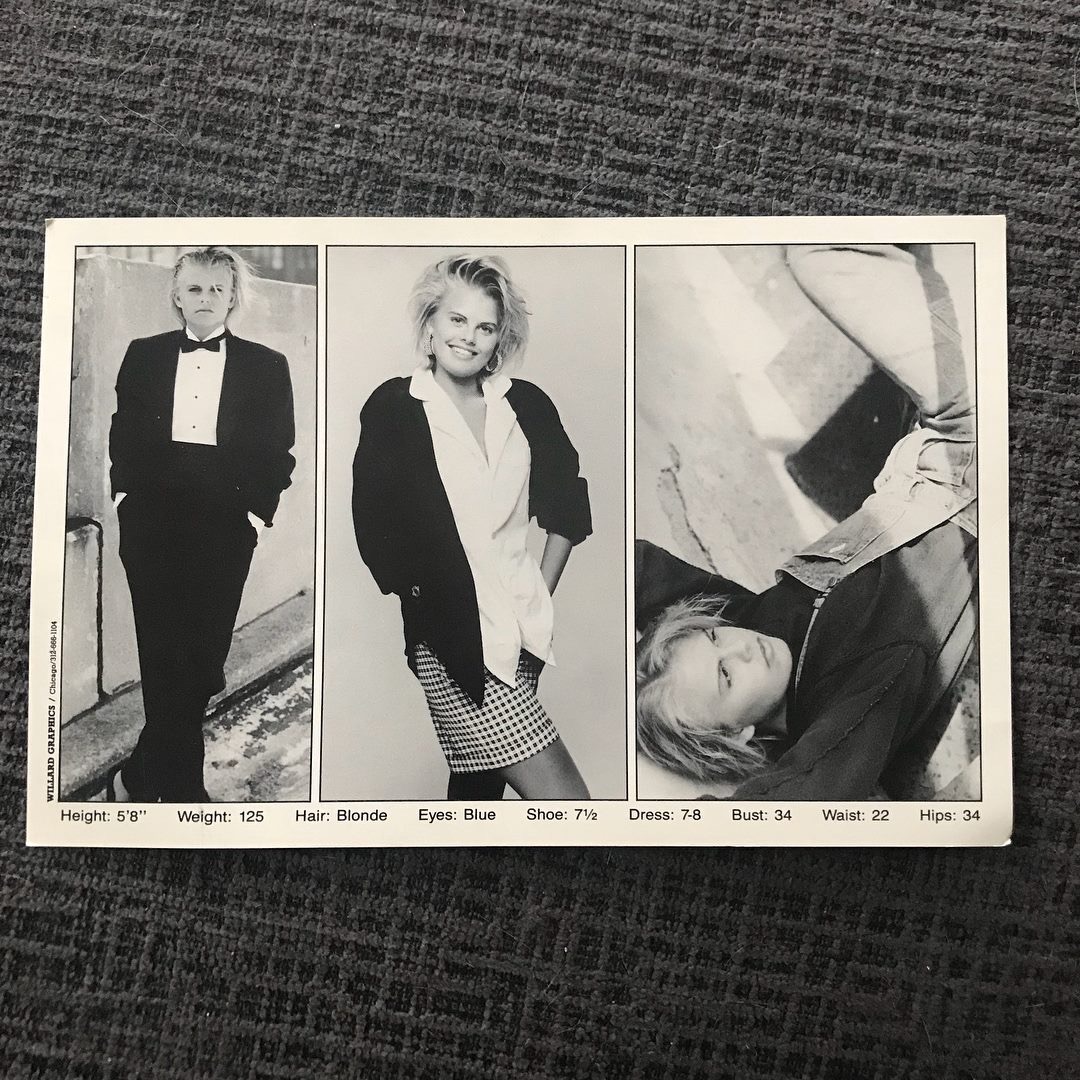
The back of my first composite card with Elite Model Management in Chicago, IL at age 13.
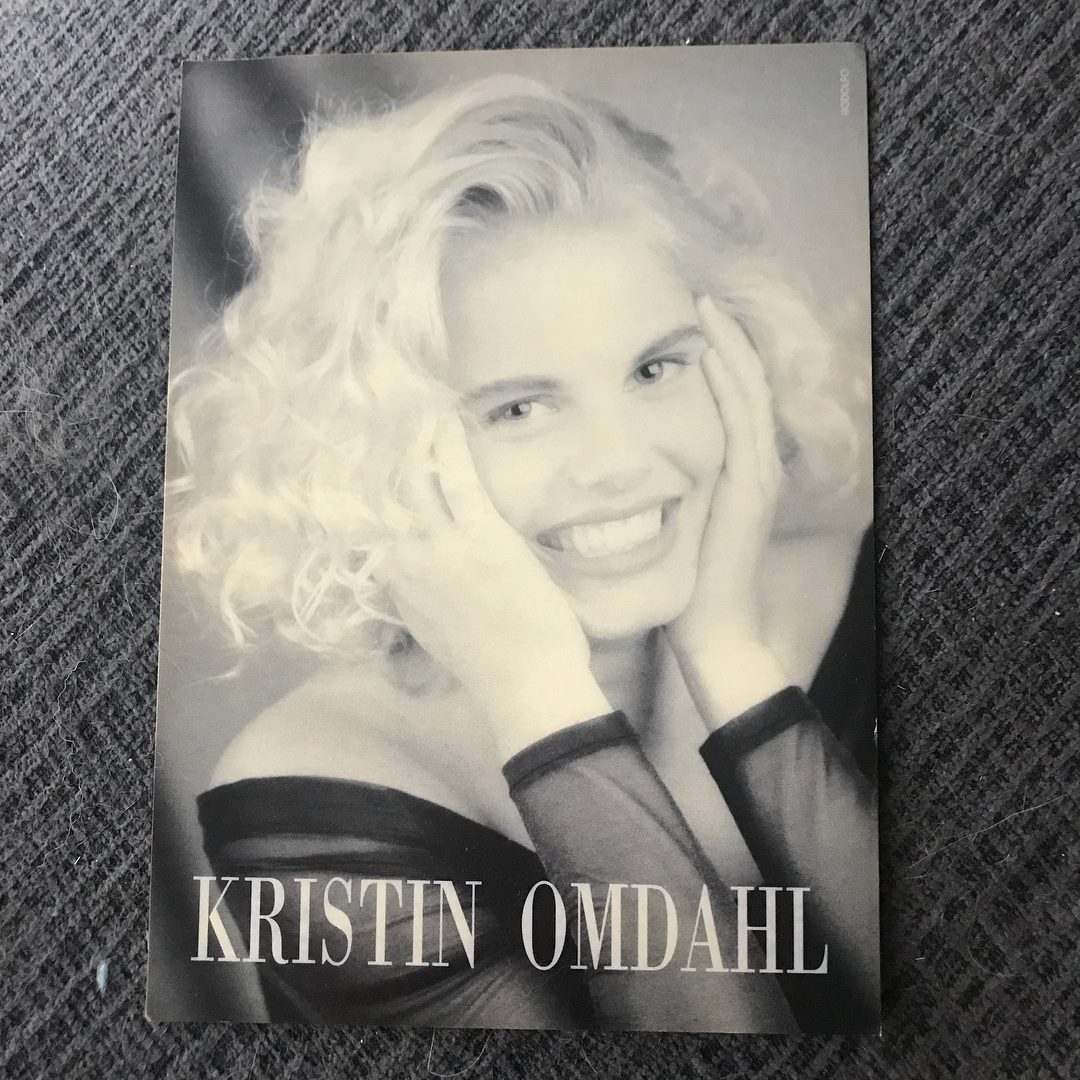
The front of my second composite card with Elite Model Management in Chicago, IL and New York City, at age 15.
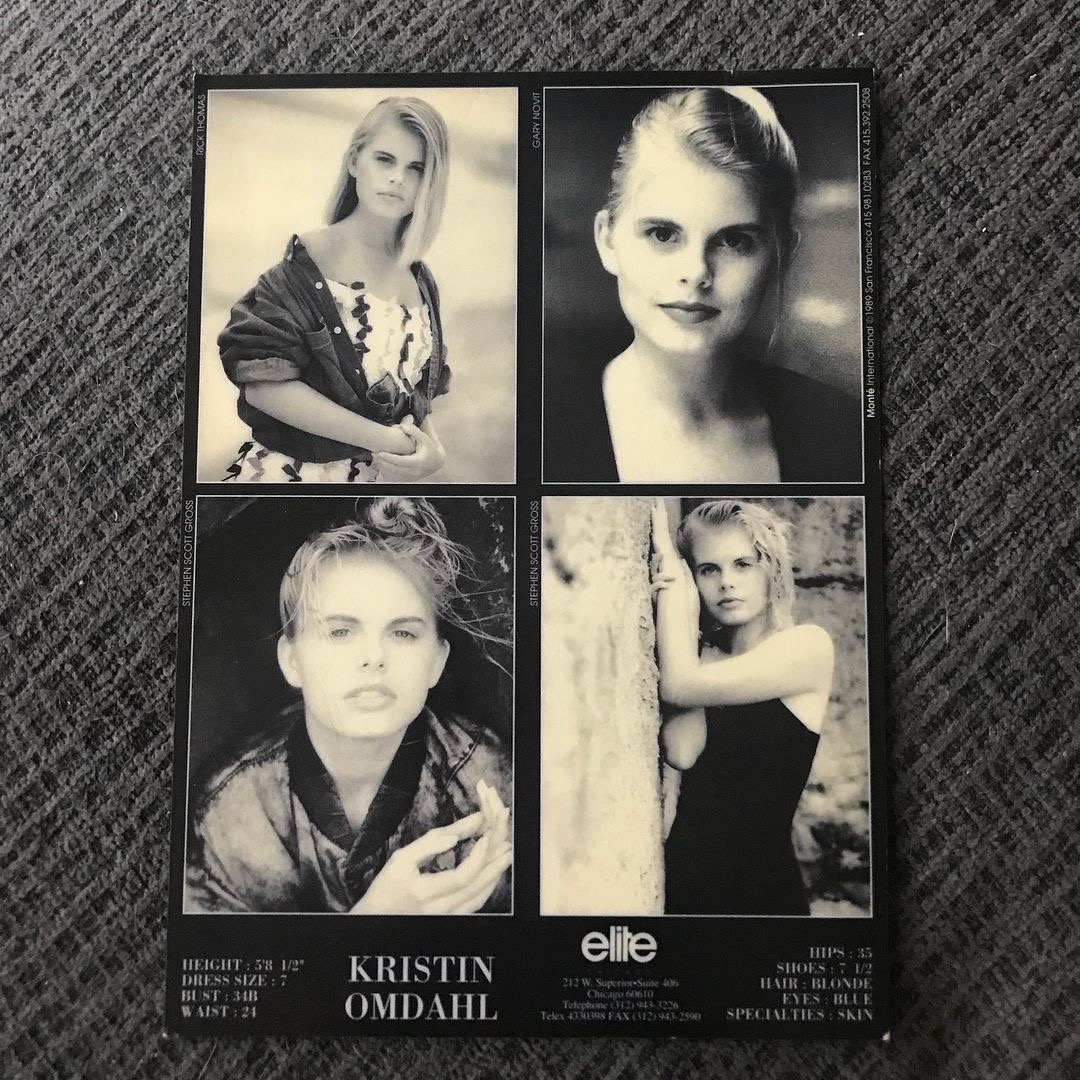
The back of my second composite card with Elite Model Management in Chicago, IL and New York City, at age 15.
Throughout my 20-year career as a knit and crochet designer, I have had the pleasure of designing and publishing nearly 1,000 patterns (so far!), each a testament to my passion and dedication to these beloved crafts. This journey has not only allowed me to create a vast portfolio of knitting and crochet designs but has also given me invaluable insights into the art of photography specifically tailored to showcase handmade creations.
Photos on set of both “Knitting Daily TV” and “Knit and Crochet Now”, the two PBS craft shows when I was a cast member on each of them:
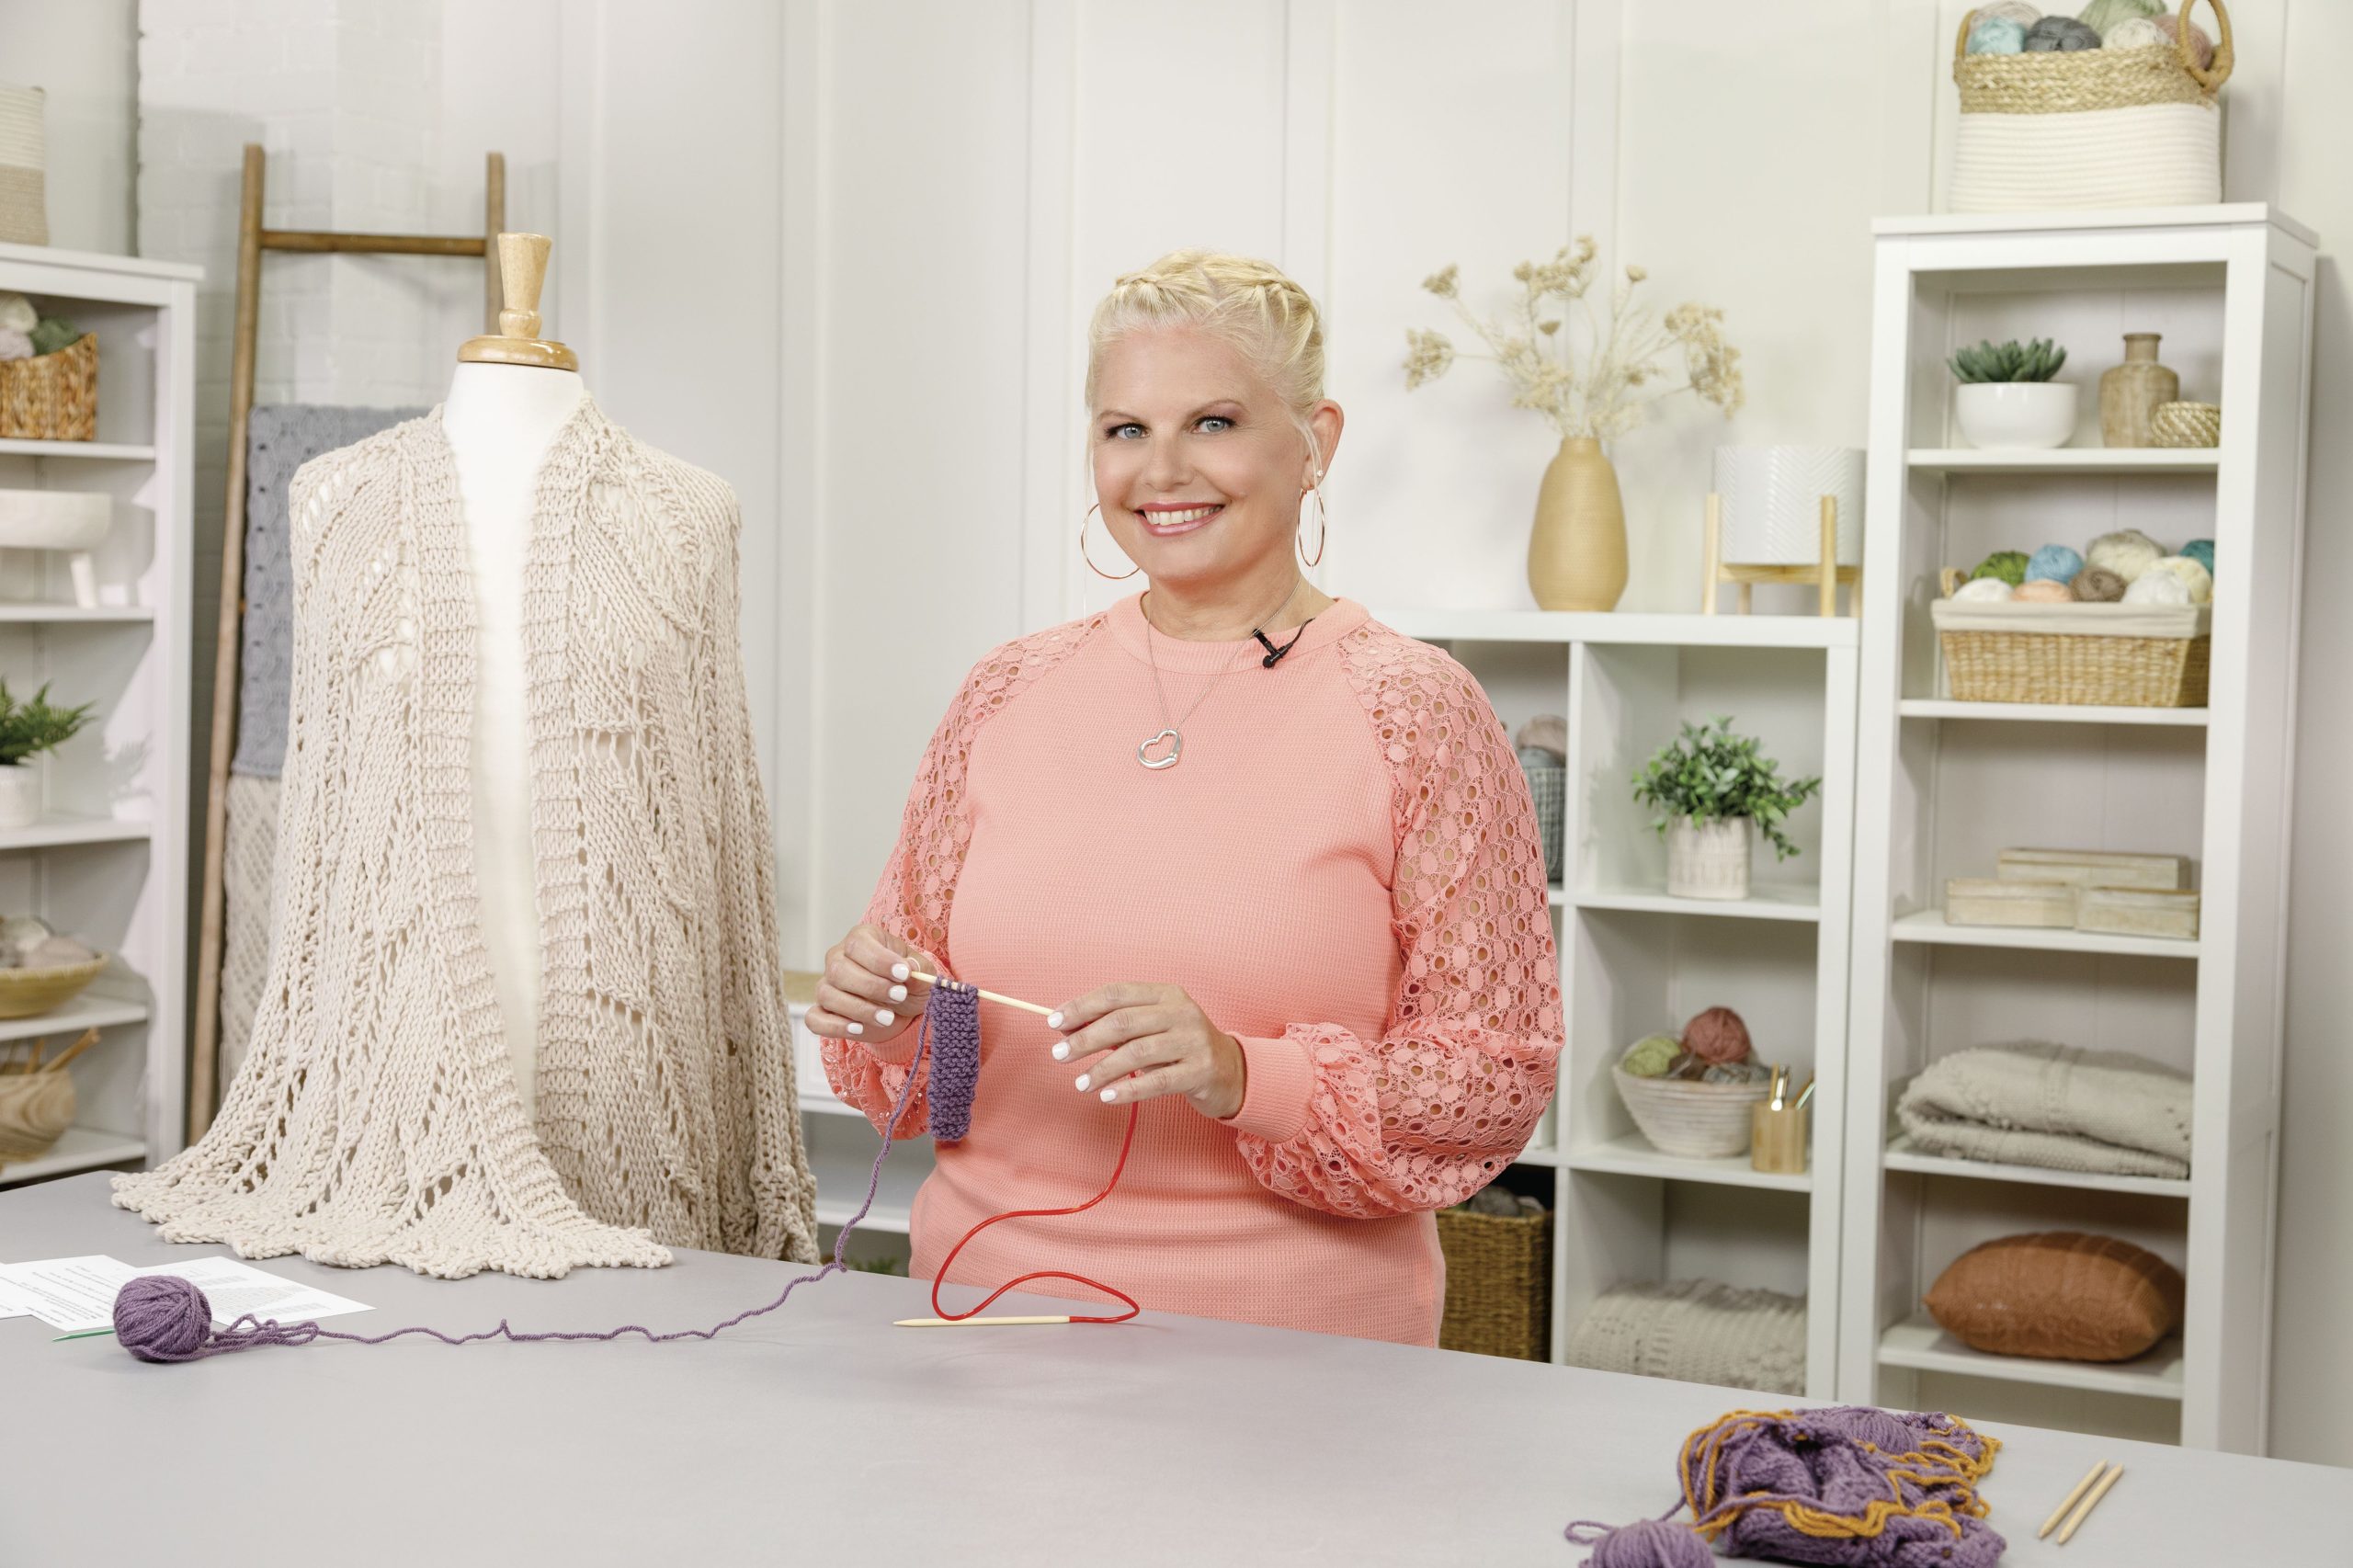
Kristin Omdahl on the set of Knit and Crochet Now!
Kristin Omdahl on the set of Knit and Crochet Now!
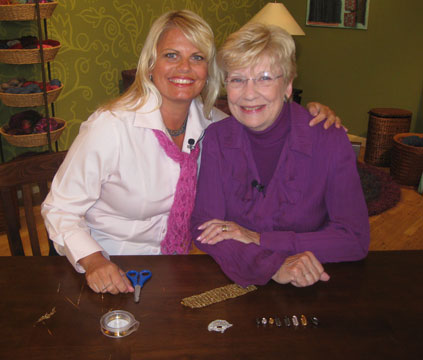
Shay Pendray and Kristin Omdahl on the set of Knitting Daily TV (PBS)
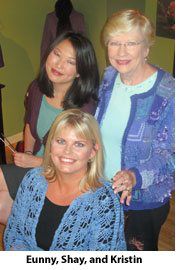
Shay Pendray, Eunny Jang and Kristin Omdahl on the set of Knitting Daily TV
In this article, I am thrilled to share my wealth of knowledge and expertise with you. Whether you’re a seasoned crafter looking to showcase your work to a wider audience or a beginner seeking to improve your photography skills, this guide is for you. Together, we will explore the nuances of knitting and crochet photography, from mastering lighting and composition to selecting the right gear and perfecting post-processing techniques.
By the end of this guide, you’ll be equipped with the tools and know-how to capture stunning photos of your knitting and crochet projects, elevating your craft to new heights. Join me as we embark on this creative journey, where every click of the shutter brings your handmade masterpieces to life.
Check out My Gallery for inspiring knitting and crochet photography examples.
The Importance of Great Photography
Photography plays a pivotal role in the world of knitting and crochet, and before we delve into the technical aspects, it’s essential to grasp why photography is an indispensable element of these crafts. High-quality photos have the power to elevate your knitting and crochet projects in various ways:
- Showcase Your Craftsmanship: At the heart of every knitting and crochet creation lies the meticulous craftsmanship that goes into it. High-quality photography acts as a window through which you can proudly display the intricate details of your work. From the delicate stitches that form intricate patterns to the vibrant spectrum of colors that breathe life into your projects, great photography captures every nuance. It’s akin to preserving a piece of art in a frame, allowing your audience to appreciate the skill and dedication that go into each stitch.
- Attract Attention: In a digital age where visual content is king, eye-catching photos are your most potent tool to capture the attention of your audience. Whether you’re a knitting or crochet enthusiast looking to share your creations on social media or a pattern designer hoping to showcase your designs to the world, compelling photography is the magnet that draws people in. Vivid colors, well-composed shots, and striking visuals can stop people scrolling through their feeds and make them pause to admire your work.
Think of your photographs as the “storefront window” for your knitting and crochet projects. Just as a beautifully decorated storefront entices passersby to step inside, outstanding photography invites people to explore your creations further. It’s the initial impression that can spark curiosity, admiration, and, in some cases, even inspire others to take up these crafts themselves.
Photography in knitting and crochet is not merely a technicality but a powerful means of storytelling and connection. It brings your creations to life, communicates your passion and expertise, and entices others to join you on this creative journey. So, as we delve into the technical aspects of photography, remember that behind every great shot lies the potential to captivate, inspire, and share the joy of knitting and crochet with the world.
Mastering Lighting Techniques
In the realm of knitting and crochet photography, the mastery of lighting techniques is paramount. The way you illuminate your creations can make the difference between a lackluster image and a breathtaking one. To capture your projects effectively, it’s crucial to consider the following aspects:
Natural vs. Artificial Light: Understanding the nuances of natural sunlight and artificial lighting is the foundation of exceptional knitting and crochet photography. Each light source has its unique advantages and disadvantages, and the choice between them can significantly impact the outcome of your photos.
- Natural Sunlight: The golden hours of early morning and late afternoon bath your creations in warm, soft light. This lighting is particularly enchanting for showcasing the intricate details of your stitches and the vibrant colors of your yarn. However, it comes with the constraint of time; you must plan your photoshoots around these hours to harness the magic of natural sunlight.
- Artificial Lighting: Artificial light sources, such as studio lights, offer consistency and control. They allow you to set up your photography environment regardless of the time of day or weather conditions. This controlled lighting is advantageous when you need precise illumination for your projects. However, mastering artificial lighting can be a skill in itself, as it requires an understanding of equipment, angles, and settings.
Shop my lighting tools on Amazon here
Diffusion and Reflection: Once you’ve selected your light source, the next step is to manipulate it effectively. This involves the use of diffusers and reflectors to shape and control the light.
- Diffusers: Diffusers soften harsh light by scattering it, creating a gentle, even illumination that minimizes harsh shadows and highlights. They are particularly useful when shooting in direct sunlight or with strong artificial lighting. By placing a diffuser between the light source and your project, you can achieve a more flattering and balanced result, showcasing your work without distracting shadows or blown-out highlights.
- Reflectors: Reflectors bounce light back onto your subject, reducing shadows and adding highlights where needed. They can be used in conjunction with diffusers to further manipulate the light. Reflectors come in various colors, allowing you to adjust the color temperature of the light falling on your project.
In essence, mastering the interplay between natural and artificial light and the skillful use of diffusion and reflection tools empowers you to create knitting and crochet photographs that do justice to your craftsmanship. These techniques enable you to highlight the intricate details of your work, emphasize the texture of your stitches, and present the full spectrum of colors in your yarn. As we explore further in this blog post, you’ll gain insights into how to harness these lighting techniques to capture the essence and beauty of your creations.
The Art of Composition
Composition in knitting and crochet photography is akin to the painter’s skill in selecting the right canvas and arranging the elements on it. It’s the art of arranging the visual components within your frame to create an image that is not just technically correct but also aesthetically pleasing. Here are some key considerations for composing compelling knitting and crochet photos:
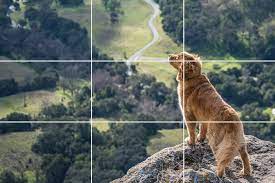 Rule of Thirds: The “Rule of Thirds” is a foundational principle in photography composition, and it’s a concept worth mastering. Imagine dividing your frame into a grid of nine equal parts, like a tic-tac-toe board. The rule suggests that the most visually appealing placements for your subject, such as the centerpiece of your knitting or crochet project, often occur at the intersections of these grid lines or along the lines themselves. Placing your subject off-center in this way can create a sense of balance and visual interest. It’s a technique that can lead to more dynamic and engaging photos.
Background Selection: The background against which your knitting or crochet project is showcased plays a pivotal role in composition. Your choice of background can either enhance the beauty of your creation or detract from it. When selecting a background, consider its color, texture, and relevance to your project. A plain, uncluttered background often works well, as it allows your creation to take center stage. However, in some cases, a thoughtfully chosen background, such as a rustic wooden table, the beach or a lush garden, can complement the theme or mood of your project.
Styling: Setting the Scene: Consider the environment in which your knitting or crochet project is photographed. Styling encompasses the arrangement of props, accessories, and even models if applicable. It involves creating a visual narrative that enhances the story your project tells. For instance, if you’ve crafted a cozy winter scarf, styling might involve draping it over a chair with a steaming cup of hot cocoa nearby to convey warmth and comfort. If your project is a summery beach tote, a sandy beach with seashells and sunglasses could be the perfect setting.
Styling allows you to infuse personality and context into your photos, helping your audience connect with your creations on a deeper level. It’s a way of telling a story through visuals and inviting viewers into the world of your knitting and crochet artistry. The clothing the model wears with the knitting or crochet project is also important and how the entire ensemble interacts with the background is also important.
Learn more about color theory for styling in this article here:
In essence, the art of composition in knitting and crochet photography goes beyond mere documentation. It’s about creating images that resonate, capturing the essence of your work, and inviting your audience to appreciate not only the craft but also the creativity and artistry behind it. As you explore these composition techniques further, you’ll discover how they can elevate your knitting and crochet photos to a whole new level of visual appeal.
Styling Your Knitting and Crochet Projects
Styling your knitting and crochet projects is a creative endeavor that can significantly enhance the visual appeal of your photos. It’s the art of adding depth, character, and context to your images, making them more than just representations of your craft. Here are some creative styling ideas to consider:
Props and Accessories: Props and accessories can be powerful tools for storytelling within your knitting and crochet photography. They can help convey the mood, theme, and purpose of your creations. For example:
- Vintage Knitting Needles: Displaying your handcrafted scarf or shawl alongside a pair of vintage knitting needles or hand carved crochet hooks can evoke a sense of nostalgia and tradition. It connects your work to the rich history of handcrafting, knitting and crochet.
- Colorful Yarn Balls: A pile of vibrant, neatly arranged yarn balls or hanks can not only add a pop of color to your photo but also highlight the range of colors used in your project. It’s a visually pleasing way to showcase your yarn choices.
- Thematic Props: Consider props that align with the theme of your knitting or crochet item. For instance, if you’ve designed a baby blanket, adding baby shoes or toys as props can create a heartwarming scene that resonates with your audience.
Model or No Model: Deciding whether to include a model or present your work solo is a crucial aspect of styling and can significantly impact the story your photos tell.
- Including a Model: If you choose to feature a model, it can provide context and a sense of scale to your creations. A model can demonstrate how your handmade garments or accessories look when worn, which can be particularly helpful if you’re showcasing clothing items. Models can also help convey emotions and lifestyles associated with your pieces. Ensure that the model’s attire and demeanor align with the overall theme you want to convey.
- You CAN be the model AND photographer: With the right equipment and a sense of adventure, you can use the timer on your camera or photo, a tripod, to create selfie-style photography. It is budget friendly, efficient on time, and can be a lot of fun!
Watch a behind the scenes video of me creating a photoshoot for a crochet cardigan pattern here:I primarily use Canva Pro for social media posts and website images as they are web-friendly sizes and easy to resize for a variety of social media requirements. And Lightroom is something I use for all applications if I want to adjust the lighting easily and beautifully with filters.
Retouching vs. Authenticity:
When it comes to post-processing your knitting and crochet photos, there’s a delicate balance to strike between retouching for perfection and preserving the authenticity of your work:
- Retouching for Perfection: Photo editing software allows you to correct minor imperfections, such as dust spots, color inconsistencies, or distracting elements in the background. You can enhance the vibrancy of yarn colors, sharpen stitch details, and ensure that your images are visually flawless. Retouching is a valuable tool for presenting your creations in the best possible light, ensuring that viewers see the true beauty of your work.
- Maintaining Authenticity: While editing can enhance your photos, it’s essential to be mindful not to over-edit to the point where your work appears unrealistic or unrepresentative of its true form. Authenticity is key, especially if you’re sharing your knitting and crochet projects for educational or inspirational purposes. Avoid excessive retouching that alters the texture of your stitches, distorts colors, or creates an unrealistic sheen. Your audience appreciates the authenticity of handmade items, and overly retouched images may lead to disappointment or mistrust.
- Exception: I do like to change the background of my images sometimes. It is a convenient way to make a photo more exciting or seasonally appropriate. I live in Southwest Florida and often am challenged for photographing winter accessories in the tropical environment. Occasionally, I will photograph a scarf at the beach, go to Canva Pro to remove the background and then pop in a wintery background for the right aesthetic.
Striking the right balance between retouching and authenticity is a matter of personal style and the purpose of your photos. For product photography where visual perfection is paramount, some level of retouching may be necessary. However, if your goal is to showcase the true nature of your handmade items or inspire fellow crafters, consider embracing the imperfections and authenticity that come with handcrafted work.
Photo editing and post-processing are valuable tools in knitting and crochet photography. They allow you to fine-tune your images, correct minor flaws, and present your creations in the best possible light. Whether you choose Adobe Lightroom, Photoshop, or Canva Pro, the goal is to approach editing with a sense of balance, ensuring that your work remains authentic and representative of the skill and craftsmanship that go into your knitting and crochet projects. Ultimately, the aim is to create images that both inspire and accurately portray the beauty of your creations.
The art of knitting and crochet photography is a powerful skill that can elevate your craft to new heights. By mastering lighting, composition, styling, and utilizing the right equipment and software, you can capture stunning photos of your projects that will leave a lasting impression on your audience.
Continue Learning
-
Explore Photography Courses to further enhance your skills.
-
Check out My Gallery for inspiring knitting and crochet photography examples.
 Kristin Omdahl patterns, books, handouts and videos are for your personal use only; additionally, up to 10 items can be made to sell from one design. Commercially produced products made from my instructions are prohibited. All Kristin Omdahl patterns, books, handouts and videos are licensed for single use and remain the intellectual property of Kristin Omdahl. This pattern may not be reproduced or transmitted in any form or by any means, electronic, mechanical, photocopying, recording or otherwise.
©Copyright 2024 All Rights Reserved
- Shop Kristin Omdahl Crochet Patterns
- Shop Kristin Omdahl Knitting Patterns
- Shop Kristin Omdahl Books
- Shop Kristin Omdahl Courses
- Browse Kristin Omdahl Videos
- Join my Patreon community
- Subscribe to my newsletter here
How Do I Download My Pattern or eBook?
Once payment is received, you will receive an email containing a download link button for the PDF pattern. If you do not receive your email immediately, please check your spam filters. If you are logged into your account at the time of purchase, you will also have 24/7 access and unlimited downloads to your pattern in your downloads library in your account section of the Kristin Omdahl website. All patterns are written in standard US terms. NO refunds on digital products.


