Free Bulky Weight Pattern, Free Cowl Pattern, Free Crochet Pattern, Free Pattern, Free Poncho Pattern
Simone Crochet Poncho Free Pattern Page
Simone Crochet Poncho Free Pattern Page by Kristin Omdahl
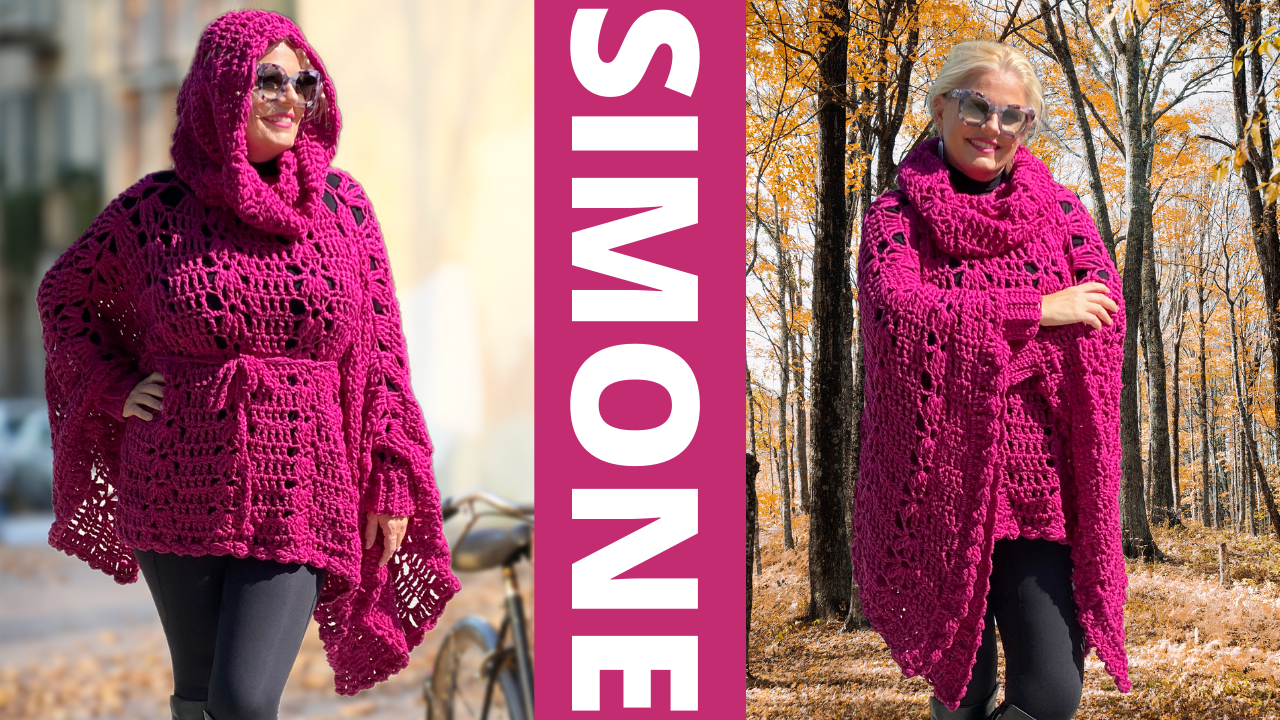
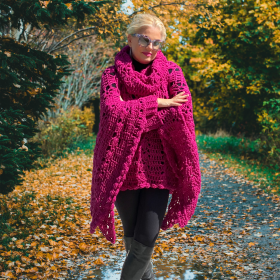
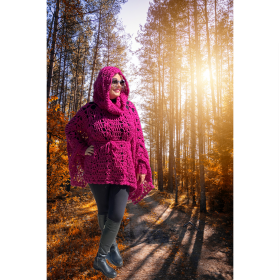
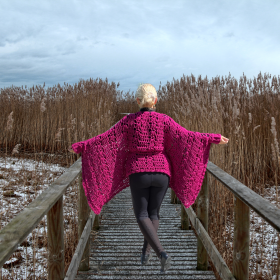
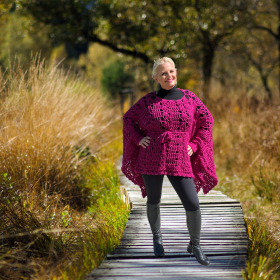
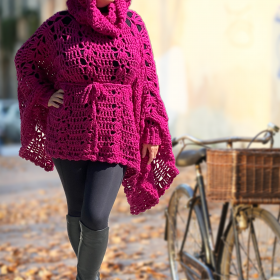
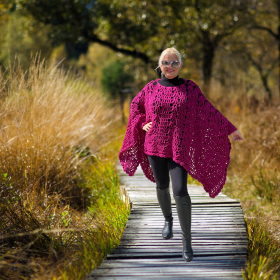
This is a figure flattering and cozy poncho with many styling options including a coordinating hood/cowl and belt. It is stylish and comforting at the same time. What is not to love about that? These easy and simple crochet projects (poncho, hood/cowl and belt) work up quickly with #5 bulky weight yarn.
Download the ad-free $1.99 PDF pattern with charts HERE
Shop Be So Easy Yarn HERE
What you will need:
- 2030 yds (1856m) #5 bulky weight yarn
- L/11 (8mm) crochet hook
- Yarn needle
- Scissors
Shown in:
Be So Easy Yarn; 145 yds (132m) per 3.5oz (100gm); 100% milk cotton, #5 bulky weight yarn; color Raspberry, 14 balls.
Gauge:
8 sts / 3.5 rows = 4 in (10cm) in treble crochet
Finished Size:
Poncho: 54 in (137cm) wide x 26 (66cm) long with 10 in (25.4cm) wide neck opening
Cowl/Hood: 20 in (50.8cm) to 30 in (76.2cm) circumference x 16 in (40.6cm) tall.
Stitch Guide:
Chain (ch), slip stitch (slst), single crochet (sc), single crochet through back loop only (sc-blo), treble crochet (tr), and 2 treble crochet cluster (2tr-cl).
Foundation oval: Ch4, tr in 4th ch from hook.
Instructions:
Poncho:
Back:
Set Up Row: *Ch4, tr in 4th ch from hook. Rep from * twenty more times. — 21 foundation ovals
Row 1: Ch4 (counts as first tr), 4tr in first foundation oval, *(2tr-cl, ch2, 2tr-cl, ch2, 2tr-cl) in next foundation oval, 5tr in next foundation oval. Rep from * across.
Row 2: Ch4 (counts as first tr), 1tr in ea of next 4 trs, *(ch3, sc in next ch2 sp)x2, ch3, 1tr in ea of next 5 trs. Rep from * across.
Row 3: Ch4 (counts as first tr), 1tr in ea of next 4 trs, *skip next ch3 sp, (2tr-cl, ch2, 2tr-cl, ch2, 2tr-cl) in next ch3 sp, skip next ch3 sp, 1tr in ea of next 5 trs. Rep from * across.
Rows 4 – 19: Rep rows 2 – 3 eight more times.
Row 20: Ch4 (counts as first tr), 1tr in ea of next 4 trs, *(1tr in next cluster st, 1tr in next ch2 sp)x2, 1tr in next cluster st, 1tr in ea of next 5 trs. Rep from * across.
Row 21: Working along row-ends of front and back, ch4 (counts as first tr), 3tr in ea row-end tr st and 1tr in end of foundation oval, across, one extra tr in last st. Fasten off.
Note: There is 1 extra stitch in the first and last row-end sts. The rest of the row-end sts have 3 tr sts each.
Neckhole Opening:
Row 1: Join with slst to 8th foundation oval from edge, (ch4, tr in 4th ch from hook)x5, skip 5 center foundation ovals from set up edge, slst in sp before next foundation oval. Fasten off.
Front:
Row 1: Join with slst to free end of first foundation oval of set up row of back, ch4 (counts as first tr), 4tr in same foundation oval, *(2tr-cl, ch2, 2tr-cl, ch2, 2tr-cl) in next foundation oval, 5tr in next foundation oval. Rep from * across.
Rows 2 – 20: Rep rows 2 – 20 of back. Do not fasten off.
Row 21: Working along row-ends of front and back, ch4 (counts as first tr), 3tr in ea row-end tr st and 1tr in end of foundation oval, across, one extra tr in last st. Fasten off.
Note: There is 1 extra stitch in the first and last row-end sts. The rest of the row-end sts have 3 tr sts each.
Sleeve Cuffs (make 2):
Right Cuff:
Row 1: Join with slst to 7th tr from shoulder seam along right side, ch9, sc in 2nd ch from hook and ea ch across, slst in ea of next 2 sts along right side, working toward shoulder seam.
Row 2: Skip last 2 slsts, 1sc-blo in ea st across.
Row 3: Ch1, sc-blo in ea st across, slst in ea of next 2 sts along right side, working toward shoulder seam.
Rows 4 – 15: Rep rows 2 – 3 until you pass shoulder seam and slst into 7 sts from shoulder seam on opposite side of sleeve. Holding both thicknesses together (first and last row of cuff), slst across. Fasten off.
Left Cuff:
Row 1: Join with slst to 7th tr from shoulder seam along left side, ch9, sc in 2nd ch from hook and ea ch across, slst in ea of next 2 sts along left side, working toward shoulder seam.
Row 2: Skip last 2 slsts, 1sc-blo in ea st across.
Row 3: Ch1, sc-blo in ea st across, slst in ea of next 2 sts along left side, working toward shoulder seam.
Rows 4 – 17: Rep rows 2 – 3 until you pass shoulder seam and slst into 7 sts from shoulder seam on opposite side of sleeve. Holding both thicknesses together (first and last row of cuff), slst across. Fasten off.
Poncho Edging:
Round 1: Working around perimeter of poncho, join with sc in any stitch. Ch1, sc in same st, *ch4, 2tr-cl in side of last sc made, skip 3 sts, sc in next st. Rep from * around, working one extra repeat in each corner (not skipping 3 sts between repeats), and working behind cuffs (skipping sts used for sleeve cuffs. Slst to first sc at beg of round to join. Fasten off.
Cowl/Hood:
Set Up Round: *Ch4, tr in 4th ch from hook. Rep from * nine more times. — 10 foundation ovals
Round 1: Slst into first foundation oval, ch4 (counts as first tr), work 4tr in same oval, *(2tr-cl, ch2, 2tr-cl, ch2, 2tr-cl) in next foundation oval, 5tr in next foundation oval. Rep from * around, (2tr-cl, ch2, 2tr-cl, ch2, 2tr-cl) in last foundation oval, slst to top of ch4 at beg of round to join.
Round 2: Ch4 (counts as first tr), 1tr in ea of next 4 trs, *(ch3, sc in next ch2)x2, ch3, 1tr in ea of next 5 trs. Rep from * around, (ch3, sc in next ch2)x2, ch3, slst to top of ch4 at beg of round to join.
Round 3: Ch4 (counts as first tr), 1tr in ea of next 4 trs, *skip next ch3 sp, (2tr-cl, ch2, 2tr-cl, ch2, 2tr-cl) in next ch3 sp, skip next ch3 sp, 1tr in ea of next 5 trs. Rep from * around, skip next ch3 sp, (2tr-cl, ch2, 2tr-cl, ch2, 2tr-cl) in next ch3 sp, skip next ch3 sp, slst to top of ch4 at beg of round to join.
Round 4: Rep round2.
Round 5: Ch4 (counts as first tr), 1tr in next tr, 3tr in next tr, 1tr in ea of next 2 trs, *skip next ch3 sp, (2tr-cl, ch2, 2tr-cl, ch2, 2tr-cl) in next ch3 sp, skip next ch3 sp, 1tr in ea of next 2 trs, 3tr in next tr, 1tr in ea of next 2 trs. Rep from * around, skip next ch3 sp, (2tr-cl, ch2, 2tr-cl, ch2, 2tr-cl) in next ch3 sp, skip next ch3 sp, slst to top of ch4 at beg of round to join.
Round 6: Ch4 (counts as first tr), 1tr in ea of next 6 trs, *(ch3, sc in next ch2)x2, ch3, 1tr in ea of next 7 trs. Rep from * around, (ch3, sc in next ch2)x2, ch3, slst to top of ch4 at beg of round to join.
Round 7: Ch4 (counts as first tr), 1tr in ea of next 6 trs, *skip next ch3 sp, (2tr-cl, ch2, 2tr-cl, ch2, 2tr-cl) in next ch3 sp, skip next ch3 sp, 1tr in ea of next 7 trs. Rep from * around, skip next ch3 sp, (2tr-cl, ch2, 2tr-cl, ch2, 2tr-cl) in next ch3 sp, skip next ch3 sp, slst to top of ch4 at beg of round to join.
Rounds 8 – 11: Rep rounds 6 – 7 two more times.
Round 12: Ch4 (counts as first tr, 1tr in ea of next 6 trs, *(1tr in next cluster st, 1tr in next ch2 sp)x2, 1tr in next cluster st, 1tr in ea of next 7 trs. Rep from * around, (1tr in next cluster st, 1tr in next ch2 sp)x2, 1tr in next cluster st. Slst to top of ch4 at beg of round to join.
Round 13: Ch1, sc in same st, *ch4, 2tr-cl in side of last sc made, skip 3 sts, sc in next st. Rep from * around, except on last repeat replace last sc with slst to first sc at beg of round to join.
Belt:
Row 1: *Ch4, tr in 4th ch from hook. Rep from * 35 more times. Fasten off.
Finishing:
Weave in loose ends. Hand wash, block to finished measurements and allow to dry.
Kristin Omdahl patterns are for your personal use only and not to be used to create items for commercial gain. All Kristin Omdahl patterns are licensed for single use and remain the intellectual property of Kristin Omdahl. This pattern may not be reproduced or transmitted in any form or by any means, electronic, mechanical, photocopying, recording or otherwise.
©Copyright 2021 All Rights Reserved
 Kristin Omdahl is the best-selling author of dozens of knit and crochet books; publisher of almost 1000 knit and crochet patterns; producer of award-winning videos; and curator of gorgeous yarns and products. You can join Kristin LIVE 5 days a week for The Kristin Omdahl Show on YouTube and browse through thousands of tutorial videos there, too.
Shop Kristin Omdahl Yarns HERE
Shop Kristin Omdahl Crochet Patterns HERE
Shop Kristin Omdahl Knitting Patterns HERE
I would love to see your creations. Just as much fun as making these myself is the satisfaction I get from seeing my designs come to life and other knit and crochet fans wearing them too. There are now 2 ways you can share what you have done!
- I have recently added a wonderful new interactive section to the website which I invite you to take part in, it has been a smashing success and such fun so far. It is the new “Share Your Project” section. You, my creators, can upload images and descriptions of your creations to share with the ever growing community! To upload simply click here.
Additionally, I host a livestreaming podcast, vlog or show weekday on my YouTube Channel called The Kristin Omdahl Show. You can join the audience and even ask me questions LIVE! I often do a show and tell, or quick demo and I always interact with the live audience. It is a lot of fun!
You can browse through close to 1000 previously recorded episodes HERE: The Kristin Omdahl Show Playlist. Make sure to subscribe to my YouTube Channel to get reminders when the next episode airs LIVE.
I look forward to seeing what you create!
xoxo,
Kristin


 Subscribe to my channel
Beautiful, cozy, and unique! Fabulous design and essential for the cold days!
Thank you so much!
Wow!! Beautiful gorgeous poncho…drool…
Thank you!