Free Cardi Vest Shrug Pattern, Free Crochet Pattern, Free Pattern
Athena Crochet Shrug Free Pattern Page
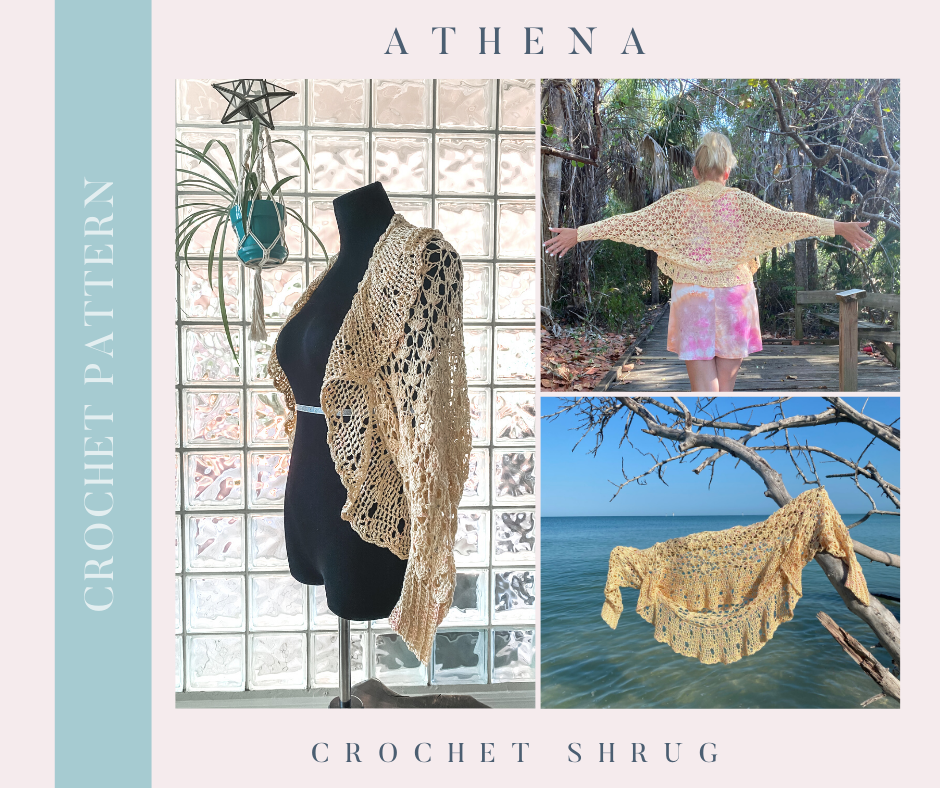
Athena Crochet Shrug Free Pattern Page by Kristin Omdahl
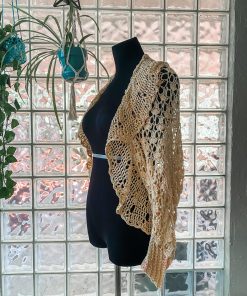
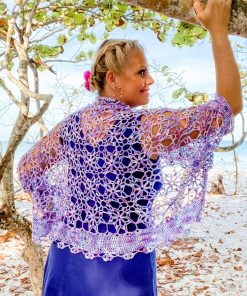
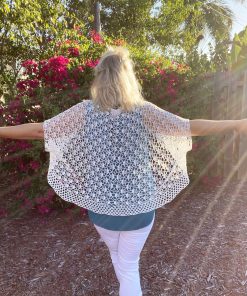
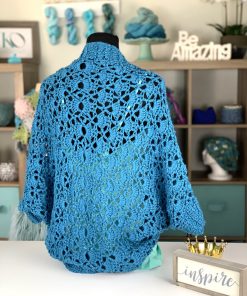
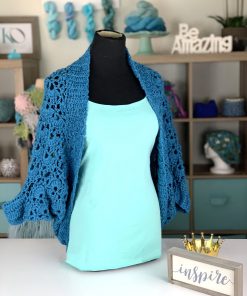
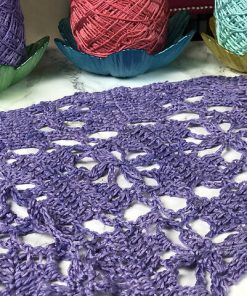
This is a quick project that transforms a simple stitch pattern into a gorgeous shrug using a few increase rows. Each side of the shrug begins at the cuff and is worked toward the center. Upon completion of the second half, the two sides are crocheted together in pattern for a seamless construction.
Download the ad-free PDF Pattern with many detailed charts for $1.99 HERE
#2 Sport Weight Yarn
#2 Sport Weight Yarn
#4 Worsted Weight Yarn
#4 Worsted Weight Yarn
#5 Bulky Weight Yarn
#2 Sport Weight Yarn
#1 Fingering Weight Yarn
#2 Sport Weight Yarn
#1 Fingering Weight Yarn
#4 Worsted Weight Yarn
#2 Sport Weight Yarn
#1 Fingering Weight Yarn
#4 Worsted Weight Yarn
#2 Sport Weight Yarn
Watch the Athena Video Tutorial Series on YouTube HERE
What you will need:
- 975 (1171, 1405) yds or 891.5 (1071, 1536)m #2 sport weighty yarn
- H/8 (5mm) crochet hook
- Yarn needle
- Scissors
Shown in:
Be So Sporty Yarn; 325 yds (297m) per 4oz (113g); 100% bamboo; color Plumeria, 3 (4, 5) balls.
Finished Size:
Back is 26 (28, 30) in or 66 (71, 76.2)cm long and shrug is 60 (63, 66) in or 152.4 (160, 167.6)cm from cuff to cuff.
Gauge:
2 stitch pattern repeats and 11 rows = 4 in (10cm) in blocked lace stitch pattern.
Stitch Guide:
Chain (ch), single crochet (sc), single crochet through back loop only (sc-blo), foundation single crochet (fsc), half double crochet through back loop only (hdc-blo), and double crochet (dc).
Note: Please scroll through entire pattern before beginning as there are many various charts and schematics to help guide you.
Special thanks to Grace Cieply for technical editing and Jennifer Arnt for testing this crochet pattern.
Instructions:
Cuff:
Row 1: 13 FSC. — 13 sts. Make sure you leave a long tail at the beginning for securing the cuff
band later.
Row 2: Ch2 (does not count as a st), hdc-tbl in ea st across. — 13 sts
Row 3: Ch1, sc-tbl in ea st across. — 13 sts
Row 4 – 19 (23, 27): Rep rows 2 – 3 eight (eleven, thirteen) more times.
Row 20 (24, 28): Rep row 2.
Right Sleeve/Right Back:
Note: Do not fasten off. At the end of last row of cuff, turn 90 degrees to begin working along end of rows.
Note: You can slst at the end of each row to join the sleeve into a round, turn, and work back in rows until desired sleeve length is achieved, then just work back and forth in rows without slst joining to create the flat back portion of the shrug. Or, you can sew up the sleeves after completion. However, for this method you would need to be certain on how wide you want the back and how long you want the sleeves before joining. For a more custom fit, it is better to try on with pins before sewing the sleeves.
Set up row (right side): Ch4 (counts as dc, *ch1), skip 1 row, 7dc in end of next row, ch1, skip 1 row, dc in next end of row. Rep from * across. — 5 (6, 7) 7dc shells
Row 1: Ch4 (counts as dc, ch1), dc in first dc, ch1, skip 2 dcs, 1dc in ea of next 3 dcs, *ch1, skip 2 dcs, (dc, ch1, dc) in next dc, ch1, skip 2 dc, 1dc in ea of next 3 dcs. Rep from * across, ch1, skip 2 dcs, (dc, ch1, dc) in 3rd ch of beg ch4.
Row 2: Ch4 (counts as dc, *ch1), work 7dc in ch1 sp, ch1, skip 2 dc, dc in next dc. Rep from * across to last ch1 sp: 7dc, ch1, dc. — 6 (7, 8) 7dc shells
Row 3: Ch4 (counts as dc, ch1), dc in first dc, ch1, skip 2 dcs, 1dc in ea of next 3 dcs, ch1, skip 2 dcs, *(dc, ch1, dc) in next dc, ch1, skip 2 dcs, 1dc in ea of next 3 dcs, ch1, skip 2 dcs. Rep from * across to last st: (dc, ch1, dc) in 3rd ch of beg ch4.
Row 4: Ch4 (counts as dc, ch1), 3dcs in ch1 sp, ch1, skip 2 dcs, dc in next dc, ch1, skip 2 dcs, *7dc in next ch1 sp, ch1, skip 2 dcs, dc in next dc, ch1, skip 2 dcs. Rep from * across to last ch1 sp: (3dc, ch1, dc). — 5 (6, 7) 7dc shells
Row 5: Ch4 (counts as dc, ch1), dc in first dc, ch1, 1dc in ea of next 3 dcs, ch1, skip 1 dc, (dc, ch1, dc) in next dc, *ch1, skip 2 dcs, 1dc in ea of next 3 dcs, ch1, skip 2 dcs, (dc, ch1, dc) in next dc. Rep from * across, ch1, 1dc in ea of next 3 dcs, ch1, (dc, ch1, dc) in last ch1 sp.
Row 6: Ch4 (counts as dc, ch1), 7dc in next ch1 sp, ch1, skip 2dcs, dc in next dc, *ch1, skip 2dcs, 7dcs in next ch1 sp, ch1, skip 2dcs, dc in next dc. Rep from * across, except on last repeat replace last repeat work (7dc, ch1, 1dc) in 3rd ch of beg ch4. — 8 (9, 10) 7dc shells
Row 7: Rep row 3.
Row 8: Rep row 4. — 7 (8, 9) 7dc shells
Row 9: Rep row 5.
Row 10: Rep row 6. — 10 (11, 12) 7dc shells
Row 11: Rep row 3.
Row 12: Rep row 4. — 9 (10, 11) 7dc shells
Row 13: Rep row 5.
Row 14: Rep row 6. — 12 (13, 14) 7dc shells
Row 15: Rep row 3.
Row 16: Rep row 4. — 11 (12, 13) 7dc shells
Row 17: Rep row 5.
Row 18: Rep row 6. — 14 (15, 16) 7dc shells
Note: Increases are complete. The rest of this section is worked even in pattern (refer to second chart).
Row 19: Ch4 (counts as dc, ch1), skip 2 dcs, 1dc in ea of next 3 dcs, *ch1, skip 2 dcs, (dc, ch1, dc) in next dc, ch1, skip 2 dcs, 1dc in ea of next 3 dcs. Rep from * across, ch1, skip 2 dcs, dc in 3rd ch of beg ch4.
Row 20: Ch3, 2dc in first dc, ch1, skip 1dc, dc in next dc, ch1, skip 2 dcs, *7dc in next ch1 sp, ch1, skip 2 dcs, dc in next dc, ch1, skip 2 dcs. Rep from * across, except end last repeat with: ch1, skip 1 dc, 3dc in 3rd ch of beg ch4. — 13 (14, 15) 7dc shells
Row 21: Ch3 (counts as dc), dc in next dc, ch1, skip 1 dc, (dc, ch1, dc) in next dc, ch1, skip 2dcs, *1dc in ea of next 3 dcs, ch1, skip 2dcs, (dc, ch1, dc) in next dc, ch1, skip 2 dcs. Rep from * across to last 2 sts: 1dc last dc, 1dc in top of ch3.
Row 22: Ch4 (counts as dc, ch1), skip 2 dcs, 7dc in ch1 sp, ch1, skip 2 dcs, 1dc in next dc, *ch1, skip 2 dcs, 7dc in next ch1 sp, ch1, skip 2 dcs, dc in next dc. Rep from * across, except on last repeat place last dc in top of beg ch3. — 14 (15, 16) 7dc shells
Note: Remainder of back worked with second chart (worked even, no more increases).
Rows 23 – 33 (37, 41): Rep rows 19 – 22 two (three, four) more times, then rows 19 – 21 once more.
Left Sleeve/Left Back:
Cuff:
Rows 1 – 20: Rep rows 1 – 20 of right sleeve/right back’s cuff.
Sleeve:
Rows 1 – 32: Rep rows 1 – 32 of right sleeve/right back.
Note: Row 33 (37, 41) of second (left) sleeve/back is joined to the right sleeve/back as you go for a seamless finish! Slst to the adjacent dc and/or specified ch on row 33 (37, 41) of the finished sleeve/back, using the chart as your guide.
Row 33 (37, 41): Ch3 (counts as dc), slst to adjacent dc on right back (RB), dc in next dc, slst to adjacent dc on RB, *slst to adjacent ch1 sp on RB, skip 1 dc, (dc, slst to adjacent ch1 sp on RB, dc) in next dc, slst to adjacent ch1 sp on RB, skip 2 dcs, 1dc in ea of next 3 dcs, working slst to adjacent dc on RB after ea dc. Rep from * across, except on last repeat replace 3dc with 2dc. Fasten off.
Assembly:
Fold shrug lengthwise and sew up sleeve seams. You may want to try on as you go to get the sleeve, body ratio comfortable for you. Use the schematic as a suggested guide.
Collar:
Note: Collar is worked along end of rows of the body opening created between the two sewn sleeves.
Round 1: Ch3 (counts as dc), evenly work 3dc in ea end of row along entire perimeter of opening. Slst to top of ch3 at beg of round to join.
Round 2: Ch3 (counts as dc), 1dc in ea of next 2 dcs, *ch3, 1dc in ea of next 6 dcs. Rep from * across, ch3, 1dc in ea of last 3 dcs, slst to top of ch3 at beg of round to join.
Round 3: Ch3 (counts as dc), 1dc in ea of next 2 dcs, *ch3, sc in next ch3 sp, ch3, 1dc in ea of next 6 dcs. Rep from * across, ch3, sc in next ch3 sp, ch3, 1dc in ea of last 3 dcs, slst to top of ch3 at beg of round to join.
Round 4: Ch3 (counts as dc), 1dc in ea of next 2 dcs, *1dc in ea of next 2 ch3 sps, 1dc in ea of next 6 dcs. rep from * around, 1dc in ea of next 2 ch3 sps, 1dc in ea of last 3 dcs, slst to top of ch3 at beg of round to join.
Round 5: Ch3 (counts as dc, work 1dc in ea of next 5 sts, *ch2, skip 2 dcs, 1dc in ea of next 6 dcs. Rep from * around, ch2, skip 2 dcs, slst to top of ch3 at beg of round to join.
Round 6: Ch3 (counts as dc, 1dc in ea of next 5 dcs, *ch3, sc in next ch2 sp, ch3, 1dc in ea of next 6 dcs. Rep from * around, ch3, sc in next ch3 sp, ch3, slst to top of ch3 at beg of round to join.
Round 7: Ch3 (counts as dc), 1dc in ea of next 5 dcs, 1dc in ea of next 2 ch3 sps, *1dc in ea of next 6 dcs, 1dc in ea of next 2 ch3 sps. Rep from * around, slst to top of ch3 at beg of round to join.
Round 8: Ch1, 5sc in first st, *skip 2 sts, 5sc in next st. Rep from * around, skip 2 sts, slst to top of first sc at beg of round to join. Fasten off.
Finishing:
Weave in loose ends. Hand wash, block to finished measurements and allow to dry.
Thank you for purchasing a Kristin Omdahl pattern!
Kristin Omdahl patterns are for your personal use only and not to be used to create items for commercial gain. All Kristin Omdahl patterns are licensed for single use and remain the intellectual property of Kristin Omdahl. This pattern may not be reproduced or transmitted in any form or by any means, electronic, mechanical, photocopying, recording or otherwise.
©Copyright 2021 All Rights Reserved









 Subscribe to my channel
Hi Kristin – thanks so much for the free shrug pattern. I’d love to try it, but I don’t see any of the charts you mention with the pattern. Do I have to purchase the PDF to get the charts? Thanks for being so generous with many of your creations!
Yes the 5 charts are included with the $1.99 PDF Pattern. Enjoy!
So the pattern isn’t “free” since we have to buy it for the charts. A picture is worth a thousand words.
Yes the written pattern is free. The $1.99 PDF Pattern includes charts. And there is a video tutorial (links on free pattern page) for every single motif. Enjoy!
love this – i am SO making this!
Pingback: 15 Free Crochet Shrug Patterns For Beginners - Craftsy