80 Handmade Gifts Book, Origami
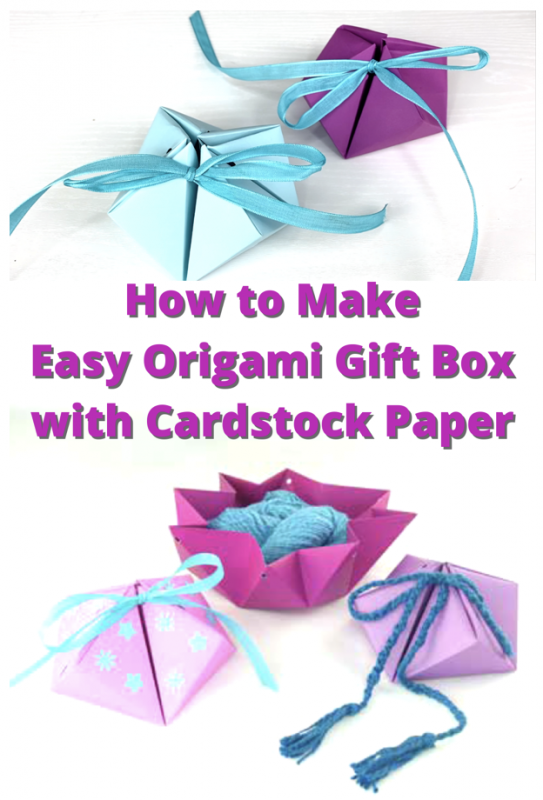
How to Fold an Origami Gift Box with Cardstock Paper Easy Beginner DIY Craft for Anyone
How to Fold an Origami Gift Box with Cardstock Paper Easy Beginner DIY Craft for Anyone
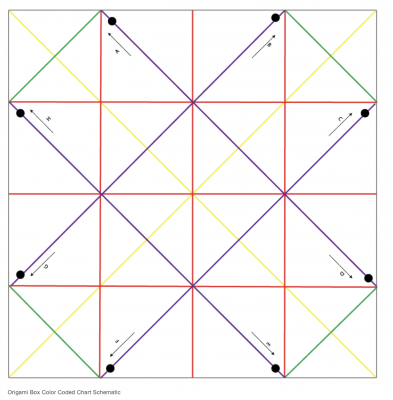
This box is simple to fold and magically transforms into a gorgeous box. Decorate with ribbons or yarn for closure and use stickers or shapes punched out of contrasting paper for added variety. The schematic notes the direction and position for adding decorations.
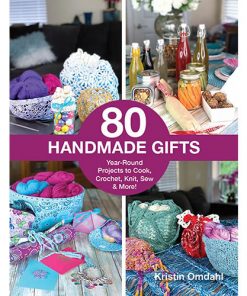
This project is featured in Kristin’s wonderful gift resource book, “80 Handmade Gifts”.
Books
“80 Handmade Gifts” book by Kristin Omdahl is your new, go-to guide for making handmade gifts anyone would love. A perfect reference to keep on hand for holidays, birthdays, and last-minute gifting opportunities year-round, including hostess, get well soon, thank you, or no-reason-at-all gifts.
This collection includes many kid-friendly projects. Bond with your loved ones and teach the next generation to create, share, and inspire others.
This collection of projects was curated with usefulness in mind: a gift that can be used regularly is the gift that keeps on giving. Choose a quick and easy project from a wide variety of disciplines including: knitting, crochet, sewing, paper crafts, cooking and more. You are sure to find the perfect gift!
Each project includes step-by-step instructions, clear photographs plus variations, to help you make each gift a one-of-a-kind.
Want more? Library of supplemental video tutorials available at:
www.KristinOmdahl.com/80HandmadeGift
“80 Handmade Gifts” book is also available on Barnes & Noble, Kindle and Amazon Prime in all markets around the world. All shopping links are available HERE.
Watch the Tutorial Video for making an origami gift box with cardstock – an easy beginner DIY Craft for Anyone HERE
What you will need to Make an Origami Gift Box:
-
12 in (30cm) square 78lb cardstock
-
Bone folder for scoring crisp folds in paper (optional)
-
Paper punch, 1/2 in (13cm)
-
18 in (47cm) 1/2 in (13cm) ribbon or Crochet chain with fringe
-
Contrasting color cardstock for decorations (optional)
Finished size:
4 in (10cm) square base, 3 in (7cm) tall
Instructions To Make an Origami Gift Box:

1. Fold diagonally from corner to corner, open and then repeat for opposite corners (yellow lines on chart).
2. Fold horizontal center line, and fold from edge to center line in each direction. Turn paper and repeat. (red lines on chart.
3. Fold from corner to opposite red intersecting lines. Repeat for all four sides (purple lines on chart).
4. Fold each corner to adjacent red intersecting lines (green lines on chart).
5. Using paper punch, make holes in paper along purple lines 1/2 in (13cm) from edge (make 8 holes).
6. Fold yellow/green corner inward, and fold purple/purple lines together inward, press and release. Thread ribbon or chain through holes and slowly cinch as you re-fold. As box is slowly cinched, the folds will take hold.
7. Punch out decorative flowers and stars with contrasting cardstock.
8. Add the decorations to the boxes with a drop of glue.
Note: The schematic shows the eight exposed sides of the box labeled as A through H, with arrows pointing up in case you need to position your decorations with direction.
Optional Crochet Chain and Fringe:
Make a crochet chain 30 in (76cm) long. Fasten off
Cut 8 pieces of yarn 4 in (10cm) long. Take 4 strands and fold in half. Insert crochet hook into last chain at end of crochet chain and pull the strands partially through. Make a slip knot. Repeat for fringe on second end.
Kristin Omdahl patterns are for your personal use only and not to be used to create items for commercial gain. All Kristin Omdahl patterns are licensed for single use and remain the intellectual property of Kristin Omdahl. This pattern may not be reproduced or transmitted in any form or by any means, electronic, mechanical, photocopying, recording or otherwise.
©Copyright 2020 All Rights Reserved
Shop Kristin Omdahl Yarns HERE
Shop Kristin Omdahl Crochet Patterns HERE
Shop Kristin Omdahl Knitting Patterns HERE
I would love to see your creations. Just as much fun as making these myself is the satisfaction I get from seeing my designs come to life and other crochet fans wearing them too. There are now 2 ways you can share what you have done!
- Share yours by joining Create. Share. Inspire on Facebook where you can interact with me as well as many other members who have a love of knitting and crochet just like you! It is a wonderful and safe place to share your photos of finished projects in my knitting or crochet patterns or yarns, and to see what others are making, too.
- I have recently added a wonderful new interactive section to the website which I invite you to take part in, it has been a smashing success and such fun so far. It is the new “Share Your Project” section. You, my creators, can upload images and descriptions of your creations to share with the ever growing community! To upload simply click here.
Additionally, I host a livestreaming podcast weekday on my YouTube Channel called Create Share Inspire Podcast. You can join the audience and even ask me questions LIVE! I often do a show and tell, or quick demo and I always interact with the live audience. It is a lot of fun!
You can browse through close to 1000 previously recorded episodes HERE: Create Share Inspire Podcast Playlist . Make sure to subscribe to my YouTube Channel to get reminders when the next episode airs LIVE.
I look forward to seeing what you create!
Kristin donates a portion of every sale to her charity Project Kristin Cares, which supports survivors of domestic violence. Learn more at KristinOmdahl.com/PKC
xoxo,
Kristin


Pingback: Handmade Gift Ideas for the Holidays and Year Round Giving